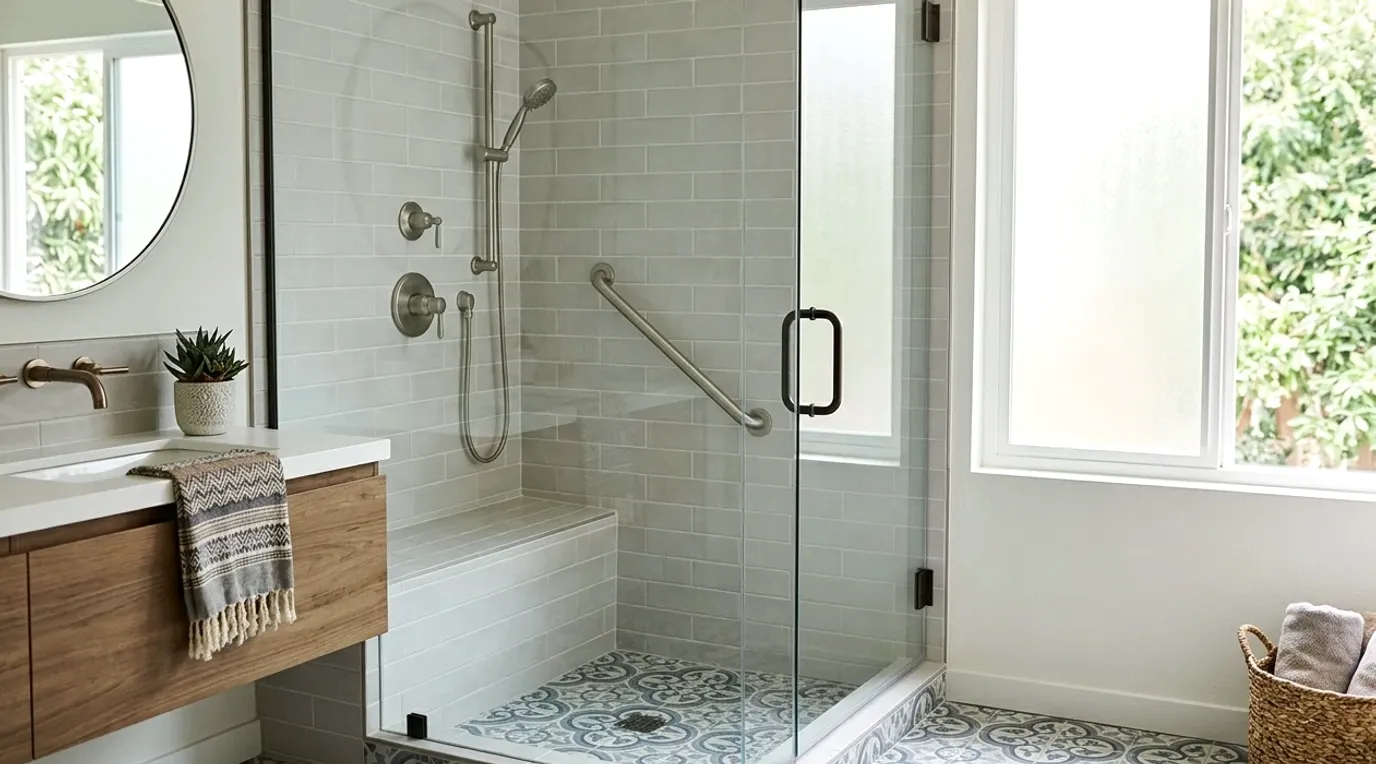
A South Bay family bathroom may serve children, parents, and grandparents each day. Planning an aging-in-place bathroom means making that shared routine easier without turning the room into a medical space.
For homeowners planning a shower remodel in San Diego, the first decision isn’t tile color. It’s how the room should work for everyone using it now and later.
Plan for different ages without making the room clinical
Start with the people, not a catalog of accessibility products. List who uses the room, what they do there, and where the current layout causes trouble. A multigenerational bathroom remodel should account for different heights, reaches, routines, and privacy needs.
Walk through an ordinary morning with your family. Notice where one person waits while another opens a cabinet. Check whether an open door blocks the toilet, vanity, or shower entrance. Look at where towels, toiletries, and cleaning supplies collect.
Then separate current needs from possible future changes. A family member may want a place to sit while bathing today. Another may want open floor area around the vanity later. Those priorities can shape the plan without forcing every possible feature into one room.
Materials and fixtures can still match the home. Supportive hardware comes in residential finishes. A shower seat can coordinate with tile and cabinetry. Storage can look built-in instead of added afterward. Consistent colors and simple lines help the room feel calm.
Keep personal dignity in the plan. Discuss who needs assistance, how much privacy they want, and which items shouldn’t sit in open storage. Don’t assume every older adult wants the same layout.
South Bay homeowners in Chula Vista and National City should also identify their permit jurisdiction before work begins. Incorporated cities run their own building departments. Whether a specific bathroom project needs a permit depends on its scope, so ask the relevant city department before approving construction documents.
Choose between a seated shower and a walk-in tub
A seated shower and a walk-in tub support different bathing routines. The right choice depends on how each household member enters, bathes, and leaves the fixture. It shouldn’t be based only on a showroom demonstration.
For a seated shower, test the proposed routine on paper. Where will the user sit? Can that person reach the controls and handheld shower without stretching? Is there a convenient place for soap, towels, and dry clothing? Ask how another person could assist without crowding the entrance.
The ADA Standards provide useful accessibility benchmarks, but they govern public accommodations and commercial facilities. They don’t apply to a private single-family home. For reference, the U.S. Access Board’s standards specify a 36-by-36-inch clear interior for a transfer shower, with a minimum 36-inch-wide entry. Treat that as a public-facility benchmark, not a rule for your house.
A walk-in tub creates a different sequence. Review how the door operates, where the controls sit, and whether the user can remain comfortable through the full bathing routine. Product dimensions, operating instructions, warranty terms, and installation requirements vary. Confirm them directly with the manufacturer and installer before choosing a model.
Think about everyone sharing the room. A child, standing adult, seated adult, and helper may each use the bathing area differently. Compare those routines with a licensed remodeler.
Our walk-in tub and accessibility bath service can connect you with an independent local pro. Families leaning toward an open bathing area can also explore a shower remodel and walk-in shower.
Place storage, controls, and lighting within comfortable reach
Comfortable reach is personal. Don’t choose cabinet heights or control locations from a generic diagram. Have each regular user stand or sit where they’ll complete the task.
Start with items used every day. Toothbrushes, soap, towels, medications, and grooming tools shouldn’t require awkward reaching. Keep cleaning products and anything unsuitable for children in storage chosen for that household.
Deep cabinets can hide small items behind larger ones. Drawers, shallow shelves, and divided storage can make contents easier to see. Place frequently used items where the intended user can reach them comfortably. Reserve less convenient spaces for occasional supplies.
Shower controls deserve the same attention. Decide whether the user will be standing, seated, or receiving help. Mark proposed locations before walls close. The person using the fixture should be able to test that reach during planning.
Lighting should support specific tasks. Review the path into the room, the vanity, the bathing area, and any floor-level changes. Look for shadows where someone shaves, applies makeup, reads labels, or handles medication. Ask the remodeler how switching will work for each user.
Don’t assume an automated fixture suits everyone. A sensor can be convenient for one person and confusing for another. Controls should be clear, predictable, and easy for the household to operate.
Use a mock-up when possible. Painter’s tape can show cabinet edges, shelf locations, and control positions before materials are ordered. A chair can help simulate seated reach. These simple tests won’t replace professional design, but they can expose an inconvenient layout early.
If a family member has specific mobility or care needs, discuss them with an appropriate healthcare professional. Pro Bath SD provides remodeling referrals, not medical advice.
Add wall support before finishes cover the framing
An aging-in-place plan includes what sits behind the finished wall. If future support hardware may be needed, discuss its possible locations while the framing is open. Tile and paint can hide preparation, but they can’t replace it.
Ask the licensed remodeler to document where wall support is added. Keep photographs and measurements with the home’s project records. Later, that information can help an installer understand what’s behind the finished surface.
Don’t select support locations from appearance alone. The intended user’s height, reach, balance, and transfer pattern matter. A bar that looks tidy may be poorly placed for that person. If the household isn’t ready to install hardware, planning the wall structure can preserve options.
The ADA Standards offer a public-facility benchmark for grab-bar height. They place the top of the gripping surface 33 to 36 inches above the finished floor. Again, the ADA doesn’t govern a private single-family home. That measurement is a reference for accessible work, not a residential mandate.
The same planning applies near a toilet, shower, or tub. Tell the remodeler which areas may need support and how the room could be used later. Ask what must be decided before framing, plumbing, electrical work, and finishes proceed.
Avoid treating towel bars as support hardware unless the product and installation are specifically designed for that purpose. Product documentation should identify its intended use. The licensed installer should follow the manufacturer’s requirements and the approved project scope.
Before finishes go up, request a walkthrough. Confirm wall preparation, control locations, storage openings, and fixture clearances against the plan. This is the moment to catch a missed detail that would otherwise disappear behind the surface.
Build a scope for a licensed South Bay pro
A clear scope helps a South Bay remodeler understand the whole household. Start with a simple room sketch and photographs. Add the names of each fixture being considered, who will use it, and what daily problem the change should address.
Your scope should distinguish required work from optional work. Required items might cover the bathing fixture, wall preparation, storage, lighting, and finish repairs. Optional items can be priced and discussed separately by the independent pro. Pro Bath SD doesn’t set contractor prices, fees, schedules, or warranties.
Ask who will obtain any required permit. In the City of San Diego, bathroom remodel permits are handled through Development Services. South Bay cities operate their own building departments. Permit requirements depend on project scope, and no verified trigger checklist or fee applies to every local jurisdiction. Confirm the current rules directly with the department serving the property.
Verify the contractor through the California Contractors State License Board. Check that the license information matches the person or business offering the contract.
California’s minor-work exemption is narrow. Effective January 1, 2026, the aggregate contract price must be under $1,000, the work must be casual or minor, and no building permit can be required. The exemption doesn’t apply when someone advertises as a contractor, and a job can’t be split into smaller contracts to avoid licensing.
For a home improvement contract, the downpayment can’t exceed $1,000 or 10 percent of the contract amount, whichever is less. Review the written scope, payment schedule, product selections, permit responsibility, and warranty terms before signing.
Finish with a family walkthrough of the proposed plan. Make sure it works for the person who needs the most support and everyone else sharing the room.
When to call us
Call when your project involves a new bathing layout, wall preparation, plumbing, electrical work, or other licensed bathroom remodeling work. Pro Bath SD matches South Bay homeowners with licensed, independent local pros and performs no physical work.
Call us at (858) 400-6619 and we’ll connect you with a licensed local bathroom remodeler.