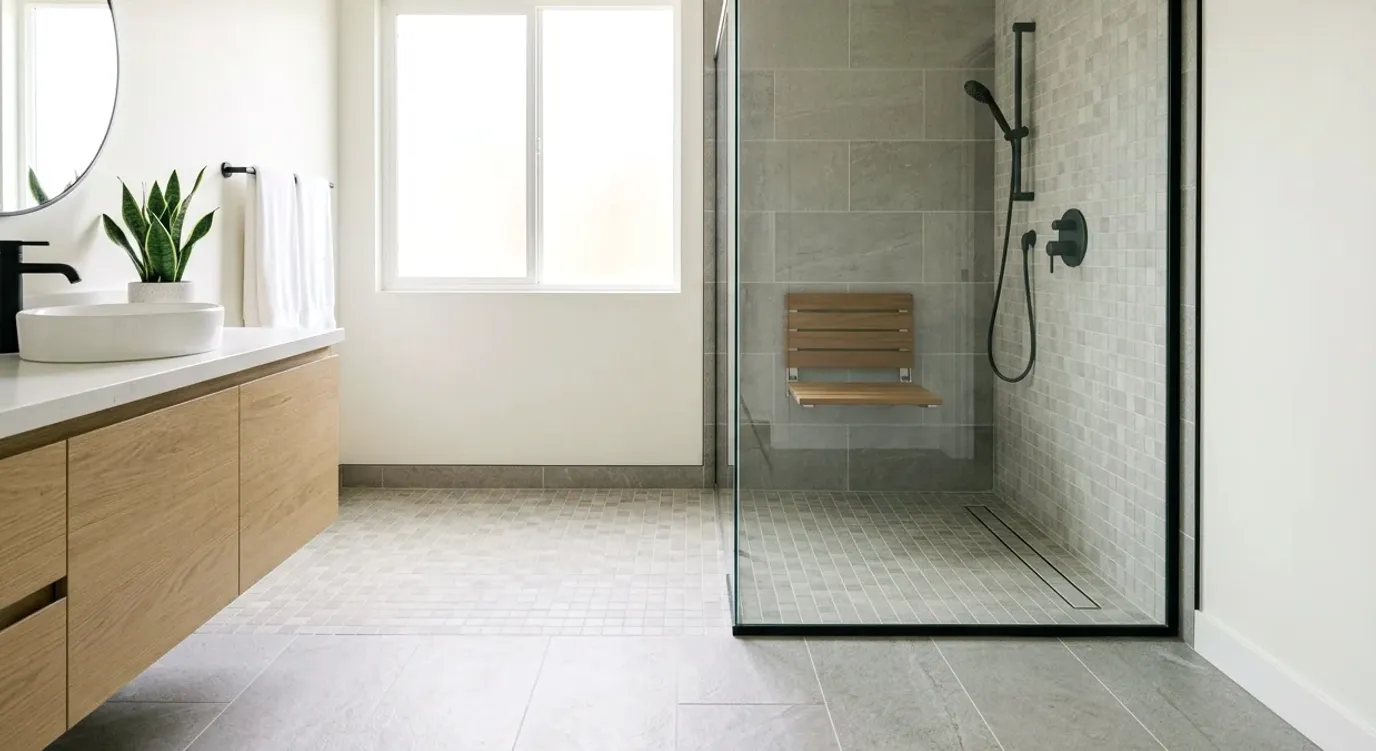
Choosing between a linear drain and a center drain affects the entire shower plan. The right answer depends on the existing plumbing, floor structure, tile pattern, glass, and proposed waterproofing system.
For a shower remodel in San Diego, settle this choice before ordering tile or approving the final layout. A licensed bathroom remodeler should inspect the room and coordinate the plumbing and tile scopes.
How each drain changes the shower floor plan
A center drain creates a point within the shower floor. A linear drain creates a longer collection line, often drawn near an edge or wall. Those different shapes affect how the finished floor is divided and where tile cuts may appear.
Start with a scaled drawing of the complete shower footprint. It should show the drain, walls, curb or entry, fixtures, bench, glass, and door movement. A drain can look balanced on an empty floor plan but feel awkward once those other pieces appear.
The drawing should also distinguish the visible drain cover from the plumbing connection below it. With a linear drain, the visible channel and the outlet aren’t necessarily the same shape or position. Product details vary, so the selected drain must be reviewed with the existing plumbing rather than chosen from appearance alone.
Don’t assume a linear drain automatically creates a curbless or accessible shower. Drain selection is only one part of that design. The floor structure, entry transition, waterproofing system, glass, and room layout still need professional review.
Likewise, don’t dismiss a center drain as an outdated choice. It may fit the existing shower footprint and visual plan. Its suitability depends on the actual room, not a universal ranking.
During a shower remodel, ask for both options to be drawn before demolition. Compare the visible tile cuts, drain location, entry, and cleaning access. That gives you a useful design comparison without relying on unsupported promises about performance or cost.
What the existing drain location allows
The existing drain location is the starting point, not the complete answer. A licensed pro should inspect the plumbing connection, framing, floor assembly, and proposed drain before confirming what the room allows.
Don’t order a linear drain because its cover appears to cross the existing outlet. The connection below the finished surface still has to match the selected product and the approved plumbing plan. An offset outlet, unusual framing, or limited access can change that plan.
The same caution applies to a center drain. Keeping a drain near its current position may seem straightforward, but the surrounding floor and waterproofing still need inspection. The finished grate position alone doesn’t reveal what’s underneath.
Ask the remodeler to identify these items in writing:
- The current drain and outlet location
- The proposed finished drain location
- Any planned plumbing relocation
- The framing or slab conditions found during inspection
- The exact drain product under consideration
- The waterproofing system proposed for the shower
- Who coordinates the plumbing, waterproofing, and tile work
The approved claims ledger doesn’t contain verified rules for drain slope, shower pans, waterproofing, or drain capacity. Those details shouldn’t be guessed from an online article. They need to come from the licensed pro’s site inspection and the instructions for the selected system.
Permit handling also depends on jurisdiction and project scope. Within the City of San Diego, bathroom remodel permits go through Development Services. The ledger doesn’t confirm which specific drain changes trigger a permit, so ask the department and your pro about the planned scope.
County Planning & Development Services handles building permits in unincorporated communities such as Alpine, Ramona, and Valley Center. Incorporated cities, including Chula Vista, Oceanside, and El Cajon, have their own building departments.
How tile size affects the decision
Drain selection and tile selection should happen together. The drain changes where the floor ends, where cuts meet, and how the pattern looks around the grate or channel.
Large tiles can make an uninterrupted layout appealing, but appearance isn’t the only concern. The tile installer still needs a workable plan for the shower floor and the selected drain system. Don’t assume a linear drain guarantees full tiles or eliminates visible cuts.
A center drain places a smaller drain element within the field. The tile drawing should show every proposed cut around it. This matters with strong patterns, veining, contrasting grout, or tiles whose edges become prominent after cutting.
Smaller tiles create a different visual rhythm around either drain. They may make individual cuts less dominant, but that doesn’t establish whether the installation is suitable. The licensed pro and tile installer should confirm compatibility with the planned floor and waterproofing assembly.
Review tile samples next to the actual drain finish. A tiny online image won’t show whether the grate competes with the grout color, fixture finish, or tile pattern. For tile-in drain covers, ask how the insert will align with the surrounding pattern and how the cover is removed for cleaning.
Cleaning access deserves its own review. Don’t accept a blanket claim that one drain style is always easier to maintain. Ask to see how the selected model opens, what parts can be removed, and what its manufacturer says about care.
Our bathroom tile and flooring service can connect you with licensed local pros who coordinate the tile plan with the broader remodel. Pro Bath SD makes the referral. The independent pro performs the physical work.
Where glass, benches, and doorways enter the layout
A shower drain shouldn’t be positioned on an otherwise empty plan. Glass, benches, doorways, and fixtures determine where people stand and how they move through the finished shower.
Start with the entry. Mark whether the design uses a swinging door, sliding panel, fixed glass, or open entrance. Show the complete door swing and nearby bathroom fixtures. Then compare that circulation space with the proposed drain position.
A drain near an entry can become visually prominent. It may also meet glass hardware, a curb, or a flooring transition on the drawing. Those intersections should be resolved before materials are ordered. Don’t assume the tile setter can improvise a clean result after construction begins.
Benches create another fixed element. The plan should show the bench footprint, its relationship to the shower controls, and the drain’s position nearby. A floating appearance or recessed detail doesn’t remove the need for structural and waterproofing review.
Fixed glass can hide part of a drain from one angle while emphasizing it from another. Ask for elevations or a simple three-dimensional view if the relationship isn’t clear on the floor plan. The goal is to see the complete composition before approving it.
For an accessibility-focused remodel, treat the drain as one component of a larger plan. The ADA Standards govern public accommodations and commercial facilities, not private single-family homes. Their dimensions may serve as design benchmarks, but they aren’t automatically legal requirements for a private San Diego residence.
Have the licensed pro review the entry, floor structure, glass, bench, and waterproofing together. A drain product by itself can’t confirm that the finished shower will meet a homeowner’s mobility needs.
What the plumbing and tile scopes should identify
A clear proposal separates responsibilities without leaving coordination gaps. The plumbing and tile scopes should point to the same drain, location, and shower drawing.
The plumbing scope should identify the selected drain product, proposed outlet position, and any planned relocation. It should also state who will confirm compatibility with the existing conditions. Avoid vague wording such as “install owner-selected drain” when no one has checked the model.
The tile scope should identify the tile, pattern direction, drain treatment, edge details, and planned cuts. It should also name the proposed waterproofing system. The ledger contains no verified waterproofing specifications, so the contract and product documentation need to supply those details.
Ask how changes will be handled if demolition reveals different conditions. Don’t rely on an assumed price, schedule, or solution. Those facts can’t be confirmed before the pro inspects the actual floor and plumbing.
The drain documentation should remain with the project records. Keep the model information, manufacturer instructions, approved drawing, and care guidance. That will help if the cover, insert, or another model-specific component needs attention later.
Before signing a home improvement contract, verify the contractor through the California Contractors State License Board. California’s home improvement downpayment cap is $1,000 or 10 percent of the contract amount, whichever is less.
Pro Bath SD connects homeowners with licensed independent local pros. We don’t perform plumbing, waterproofing, tile, or permit work. Confirm the final drain plan directly with the remodeler responsible for the project.
When to call us
Call when the drain choice affects plumbing, framing, waterproofing, tile, glass, or an accessible entry. Those connected decisions need a licensed bathroom remodeling pro who can inspect the room and document the proposed scope.
Call us at (858) 400-6619 and we’ll connect you with a licensed local bathroom remodeler.