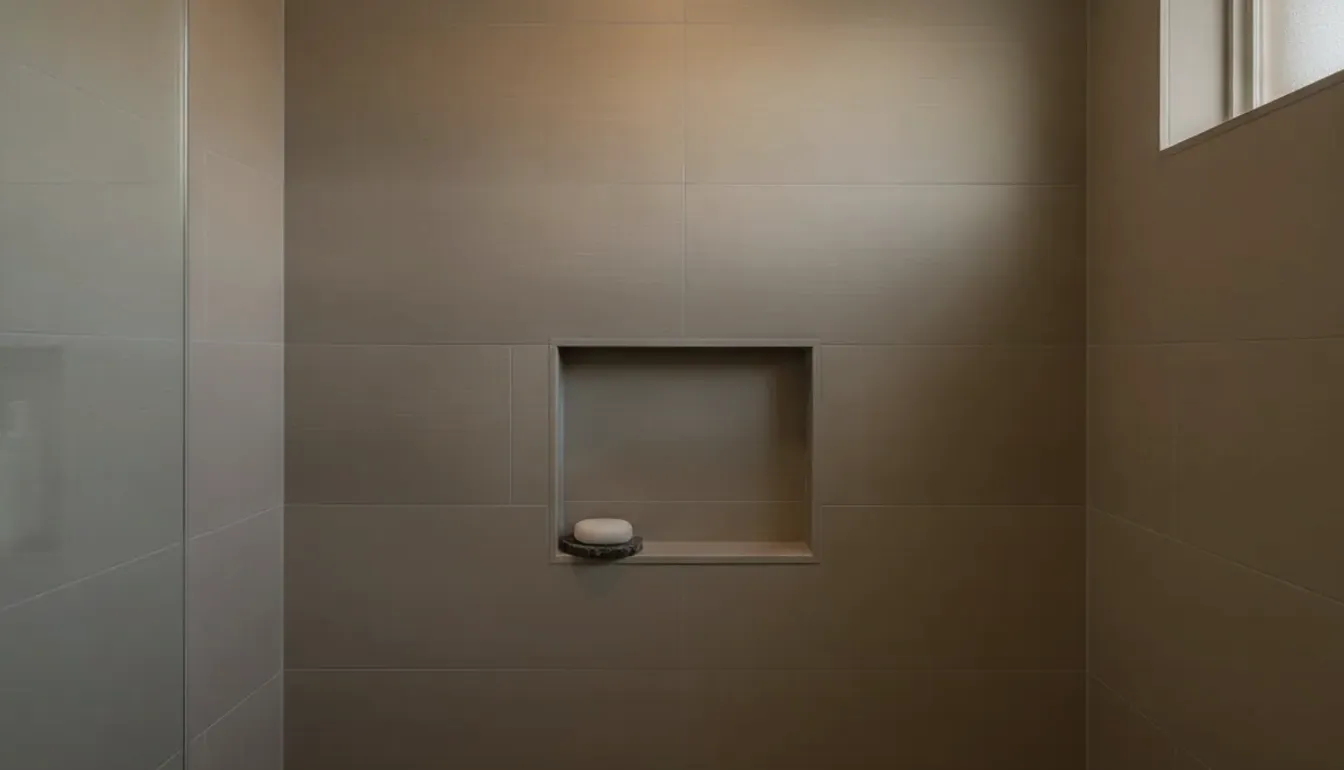
A shower niche looks simple after the tile is finished. Planning it requires several decisions before the wall closes. Location, framing, plumbing, tile layout, storage, and waterproofing all need one coordinated plan.
The safest approach is to choose the tile and niche concept early. Then have the licensed installer confirm every technical detail before framing or ordering materials. That prevents a design choice from colliding with something hidden inside the wall.
Choose the niche location before the wall closes
Start with the people who’ll use the shower. Gather the bottles, soap containers, and other items they expect to store. A niche that looks balanced on a sketch may not suit the household’s actual products.
Next, consider reach. The niche should be convenient for regular users without forcing an awkward turn or stretch. A shared bathroom may need a different arrangement than a primary bathroom used by two adults. Accessibility needs should enter this conversation early, not after the tile arrives.
Decide whether the niche should blend into the wall or become a focal point. Matching field tile can keep the recess quiet. Contrasting tile makes its position and proportions more noticeable. Either direction affects the tile order, edge treatment, and layout plan.
View matters too. Some homeowners want the niche visible through the shower glass. Others prefer it on a less prominent wall so bottles don’t dominate the room. Check the view from the bathroom door, vanity, and main walking path.
Mark the proposed area on the unfinished wall. Use removable tape to outline the intended opening. Place the household’s products within that outline, or use paper templates matching their profiles. This isn’t a technical measurement. It’s a practical way to test the storage idea before construction advances.
For a larger shower remodel, settle the niche concept alongside the shower controls, glass, bench, and tile. Ask the licensed remodeler to approve the final position before the wall closes. Don’t rely on a rendering alone.
How studs, pipes, and valves limit placement
A niche occupies space within a wall, so the visible surface doesn’t tell the whole story. The licensed remodeler needs to inspect the proposed location before treating it as final.
Ask what sits behind the wall. Studs, pipes, valves, wiring, and other building components may affect the available location. Don’t assume those elements can be moved simply because a drawing shows a niche there. Any change should be reviewed by the appropriate licensed professional.
The valve wall deserves special attention. Homeowners often want storage near the controls, but that wall may already have important components behind it. A different wall could offer a cleaner plan. The right choice depends on the actual shower and what the installer finds.
Wall type also matters. Before approving a niche, ask whether the wall is interior or exterior and whether the proposed recess conflicts with the existing assembly. The approved claims ledger doesn’t establish a universal rule for niche placement in either wall type. Your installer should evaluate the specific wall rather than applying a generic online checklist.
Don’t approve structural changes based on appearance alone. If framing affects the niche location, the remodeler should explain the proposed approach before work continues. Get that decision documented with the other project details.
Permit needs depend on the overall scope. For homes within the City of San Diego, bathroom remodel permitting goes through Development Services. Homes in unincorporated San Diego County use County Planning & Development Services. Incorporated cities run their own building departments.
No verified niche-specific permit trigger could be confirmed for this guide. Ask the remodeler and the correct local department about your project before work begins.
Why tile layout changes the finished opening
Shower niche placement and shower niche tile layout should be planned together. Otherwise, the framed recess may land awkwardly within the selected pattern.
Choose the actual wall tile before locking the niche position. A product name or nominal format isn’t enough for final planning. The installer needs the tile, intended joint pattern, orientation, edge treatment, and proposed niche finish.
Ask for a layout drawing or a dry layout using the selected materials. It should show how courses meet the niche’s top, bottom, and sides. This review gives you time to discuss narrow cuts, interrupted patterns, or an opening that appears off-center after tile.
The finished opening shouldn’t be assumed from the unfinished framing. Ask the installer to calculate it using the full selected assembly. That includes every planned surface and edge detail. No universal allowance is approved in the claims ledger, so the installer must determine the project-specific result.
Edge treatment can change both appearance and ordering. Some designs use coordinating trim. Others use a profile or another finished-edge approach. Confirm that the chosen tile collection supports the intended detail before purchasing the full order.
Patterned tile needs another visual check. Decide whether the pattern should continue through the niche, restart within it, or change intentionally. Veining and directional textures also need an agreed orientation. Put that decision in the tile plan so it isn’t improvised during installation.
Our bathroom tile and flooring service connects homeowners with licensed local pros who can coordinate these choices. Pro Bath SD makes the referral and performs no physical work.
Waterproofing corners, shelves, and the lower surface
A waterproof shower niche needs a project-specific installation plan. It includes several interior surfaces, corners, transitions, and any shelf. Those details should be assigned before tile work starts.
Ask the licensed installer to identify the complete waterproofing system proposed for the shower and niche. Confirm that the niche, surrounding wall, and transition details are compatible within that plan. Follow the selected manufacturer’s current written instructions. Don’t combine online advice from unrelated systems.
The approved claims ledger doesn’t verify membrane overlap figures, niche slope figures, shower-pan details, or a universal installation sequence. This article won’t invent them. Have the installer state which instructions govern the work and how compliance will be checked before tile covers the assembly.
Pay close attention when a shelf is included. Ask how the shelf changes the waterproofing and tile plan. Confirm its material, edge finish, final position, and connection details before ordering. A last-minute shelf substitution can affect several earlier decisions.
The lower surface also needs an explicit plan. Ask the installer how its finished configuration will be set and verified under the chosen system. Don’t specify a slope from an unsourced blog or social post. No approved residential niche slope figure was available for this page.
Photographs can support project documentation. Ask whether the remodeler can record the niche after waterproofing and before tile. This doesn’t replace proper installation or inspection. It gives the homeowner a useful record of work that will soon be hidden.
Before tile begins, request a niche review. Confirm location, finished opening, shelf arrangement, edge treatment, tile alignment, and waterproofing plan together.
When a corner shelf is the safer design choice
A recessed niche isn’t the right answer for every wall. When the proposed opening conflicts with hidden components or creates unresolved coordination problems, a corner shelf may preserve storage without forcing that niche location.
Treat this as a design alternative, not an automatic fallback. Corner shelves come in different materials and attachment approaches. Ask the licensed installer which options work with the selected tile and waterproofing system. Confirm the shelf’s size, position, edge finish, and installation sequence before ordering it.
A shelf may also suit a shower where the wall tile should remain visually uninterrupted. It can avoid turning bottle storage into the room’s main feature. That choice is personal, so compare both ideas from the doorway and through the planned glass.
Test usability before committing. Mock up the shelf position with tape and a cardboard template. Make sure regular users can reach it comfortably. Check that the products intended for the shelf fit the proposed arrangement.
Don’t assume a corner shelf can be added at any stage. Ask when its selection becomes final within the installer’s chosen system. Product-specific requirements weren’t verified for this guide, so the installer and manufacturer instructions should control that decision.
If neither the niche nor shelf plan feels settled, pause the tile order. It’s easier to reconsider storage while the design remains visible on paper. Once several trades and materials depend on one location, a small revision can affect the wider shower plan.
The best choice is the one that fits the wall, tile, household, and approved installation system. It doesn’t need to follow a showroom trend.
When to call us
Call when niche placement affects framing, plumbing, tile layout, or the shower’s waterproofing plan. Those decisions need coordination from a licensed bathroom remodeling professional before the wall closes.
Call us at (858) 400-6619 and we’ll connect you with a licensed local bathroom remodeler.