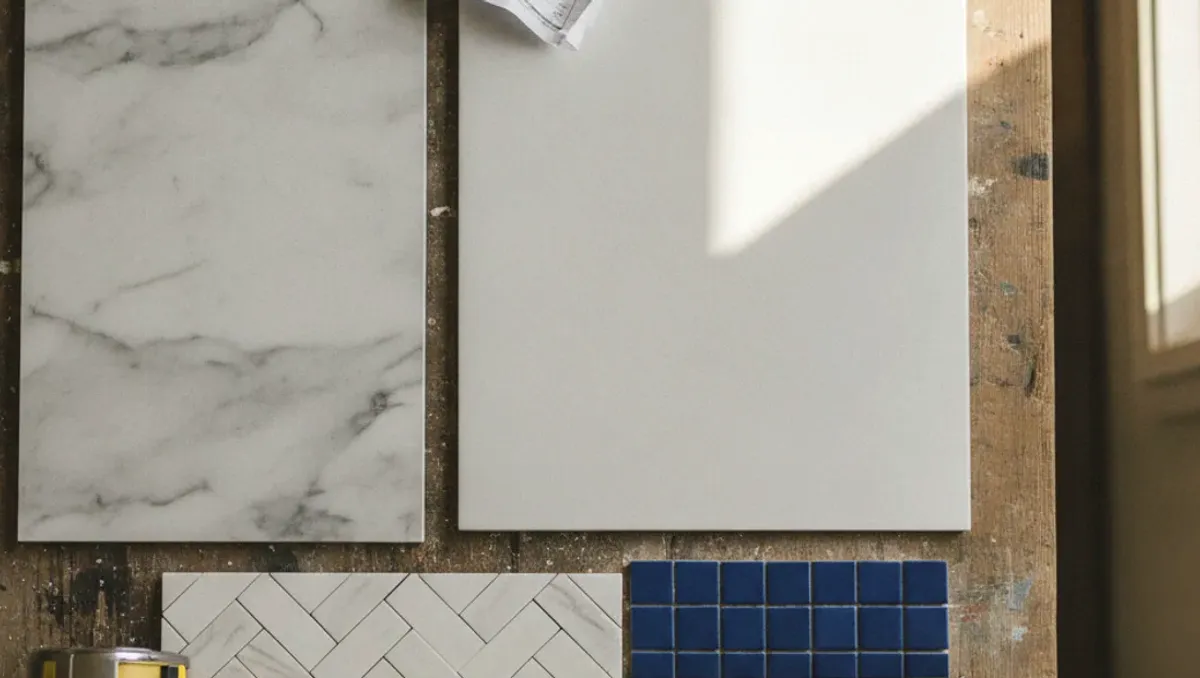
A shower remodel in San Diego can stall at one basic choice: large-format or mosaic tile. Large-format tile creates broad visual fields, while mosaic tile makes the grout pattern part of the design. The right answer may differ between the shower walls, floor, niche, and curb.
Don’t order from a showroom display alone. Confirm the exact product, finish, layout, and intended location with a licensed installer first. A tile that works on the wall may not suit the planned shower floor.
How tile size changes the visual layout
Tile size controls how your eye reads the shower. Large-format tile emphasizes each tile face. Mosaic tile emphasizes repetition, joints, and pattern. Neither look is automatically better.
Large-format tile can create calm wall sections with fewer visible divisions. That makes color movement, veining, or a plain surface more prominent. It also makes every remaining joint and cut easier to notice. A centered layout may feel balanced, while narrow pieces at one edge may distract from the broad look.
Mosaic tile has a busier rhythm. The pattern can become an accent, even when every piece uses one color. Contrasting grout makes that pattern stronger. A closer grout color softens it. Ask to see a sample with the proposed grout color, not just a loose tile sheet.
Room proportions matter too. A tile may look restrained on a showroom panel but dominate a compact shower. Place several samples together at home. View them from the bathroom doorway and from inside the shower. Check them under the bathroom’s actual lighting.
Many San Diego remodels use both scales. Large-format tile can define the main walls, while mosaic appears on the floor or inside a niche. That pairing keeps the wall layout quiet without removing detail.
A bathroom tile and flooring consultation should address the whole composition. Ask where full pieces will land, which joints will align, and where cut edges will remain visible. Those answers matter more than a sample viewed by itself.
Where the shower floor limits the choice
The shower floor isn’t simply another surface. Its shape, drain location, boundaries, and selected tile must work together. The best tile size for a shower floor can’t be chosen from appearance alone.
Mosaic tile gives an installer many small pieces to arrange across the floor. Large tile presents broad, rigid faces and may require a different cutting plan. Whether either product suits your floor depends on the planned geometry and that product’s approved uses.
Don’t assume that every mosaic is floor-rated. Don’t assume every large wall tile can continue across the shower floor. Ask for the manufacturer’s current product sheet. It should identify where that exact tile may be used. If the document doesn’t answer the question, ask the manufacturer and your licensed installer before buying.
The drain plan also needs to be settled early. Changing it after tile selection can change the layout, cuts, and material quantities. Our guide to linear drains and center drains can help you frame that design conversation. Your installer still needs to confirm what fits the actual shower.
Slip ratings, shower-floor dimensions, slope details, and waterproofing rules aren’t confirmed in the approved sources for this page. We won’t invent them. Request the selected tile’s published technical data and ask the licensed installer to explain how it applies.
For a larger shower remodel or walk-in shower, settle the floor tile with the drain and layout decisions. Don’t treat it as a last-minute match for the wall tile. That sequence reduces the chance of buying a visually appealing product that doesn’t fit the planned floor.
What cuts, corners, and niches require
A shower isn’t one flat rectangle. Corners, plumbing openings, benches, curbs, niches, and wall endings interrupt the tile field. Tile size changes how those interruptions appear.
With large-format tile shower walls, fewer pieces may cover the main field. Yet each opening can affect a larger portion of the layout. The installer may need to decide whether a cut continues across adjacent surfaces or ends at a corner. That decision should appear in the layout before materials are ordered.
Mosaic tile can create a distinct border around an opening. It can also introduce several joint lines that must meet surrounding tile cleanly. Sheet boundaries may become visible if the spacing between sheets doesn’t match the spacing within them. Ask how the installer plans to keep the finished field consistent.
Niches deserve their own drawing or marked elevation. Decide whether the back matches the shower floor, repeats the wall tile, or becomes an accent. Then identify the tile planned for the niche sides, top, bottom, and outside edges. Our shower niche planning guide covers the choices that should happen before installation.
Edge treatment also belongs in the selection conversation. The exposed edge may use a matching trim piece, another approved profile, or a cut finish suited to that product. Availability varies by tile line, so don’t assume a matching piece exists.
Bring the installer a list of every transition. Include the niche, curb, bench, doorway, outside corners, and wall endings. Ask for the intended treatment at each location. A complete plan helps prevent a substitute edge or awkward cut from becoming the most noticeable part of the shower.
How grout lines affect daily care
The clearest maintenance difference is visible before installation. Large-format tile generally creates fewer grout lines across the same wall area. Mosaic creates many more. That changes what you’ll inspect and clean, but it doesn’t prove one choice will always be easier.
Tile material, surface texture, grout selection, joint appearance, and cleaning instructions all matter. This page’s approved sources don’t establish grout performance, sealing schedules, stain resistance, or product lifespans. Check the written guidance for the exact tile and grout under consideration.
Think about how much grout you want to see. A contrasting grout color outlines every piece. With mosaic, that can turn the joint grid into the main visual feature. With large-format tile, contrast can emphasize the fewer lines that remain. A close color match reduces that effect, though the joints will still be present.
Take samples home before choosing a light or dark combination. Bathroom lighting can change how strongly the grout and tile contrast. Look at the samples beside the vanity, flooring, and painted walls. A choice that feels subtle under showroom lighting may read differently at home.
Ask who will provide the care instructions. Keep the manufacturer’s documents after the remodel. They should guide product-specific cleaning rather than general advice from social media.
Daily habits matter as well. If you dislike inspecting many joints, include that preference in the design brief. If pattern and texture matter more, mosaic may justify the added visual activity. Choose based on the care routine you’ll actually follow, not a claim that either format is maintenance-free.
What the tile quote should separate
A useful tile quote should let you see what you’re buying. It shouldn’t hide every surface and material inside one unexplained total. Ask the licensed remodeler to separate the wall tile, shower-floor tile, accent tile, trim, grout, setting materials, and labor.
The quote should also identify layout-related work. Ask whether it includes the niche, curb, bench, plumbing openings, corners, and exposed edges. Decorative bands or changes in pattern should appear clearly. If large-format pieces need special handling or cuts, request a separate description. If mosaic sheets need added layout work, request the same.
Material quantities should connect to the approved layout. Ask how breakage, pattern matching, and future replacement pieces are handled. Don’t invent a waste percentage yourself. The installer should calculate the order for the actual product and shower.
Confirm who orders the tile and who checks the shipment. Record the manufacturer, collection, color, finish, and product identifier. Similar names can cover different products. Make sure the floor and wall selections aren’t swapped.
Permitting depends on project scope. Within the City of San Diego, bathroom remodel permits are handled through Development Services. Homes in unincorporated areas, including Ramona, Valley Center, and Alpine, use County Planning & Development Services. Incorporated cities such as Chula Vista, Encinitas, and El Cajon run their own building departments. Specific permit triggers and fees couldn’t be confirmed for this page, so ask the correct jurisdiction about your project.
Check the contractor through the official CSLB license lookup. California home improvement downpayments can’t exceed $1,000 or 10 percent of the contract amount, whichever is less.
Before signing, confirm exclusions, change-order handling, product substitutions, and the proposed tile layout. The quote should distinguish the visual upgrade from the work needed to support it.
When to call us
Call when tile size affects the shower floor, drain, niche, or several visible transitions. Those choices need review by a licensed bathroom remodeling pro before you order materials. Call us at (858) 400-6619 and we’ll connect you with a licensed local bathroom remodeler.